QLI.fr user guide
Everything from signing up through your first short link, QR code and statistics to subscriptions, card payment and invoices. The pictures show what each screen looks like.
1 Sign up and log in
- Click “Sign up” in the top right corner.
- Enter your e-mail and a password (at least 12 characters). Your name is optional.
- Accept the terms and conditions and click “Create account”.
- You are signed in straight away and can create links. A new account starts on the free Free plan.
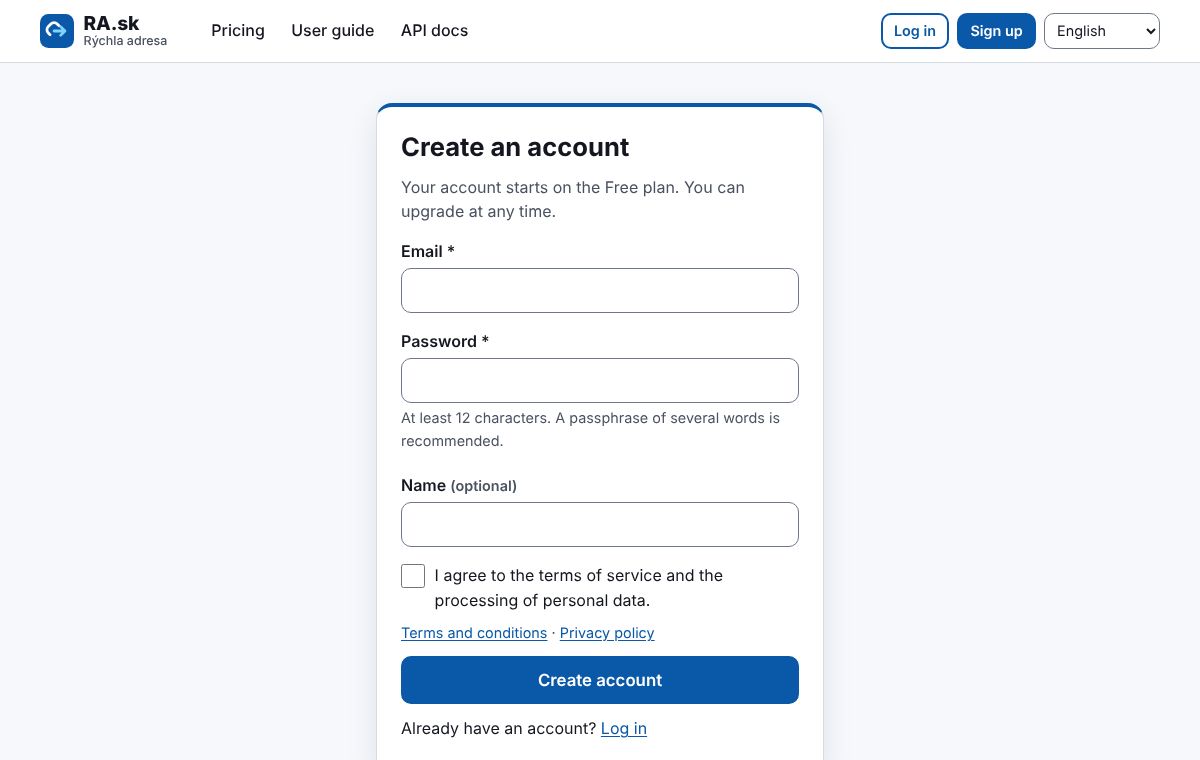
- Next time, use “Log in” with your e-mail and password. If two-factor authentication is on, you will also enter a code from the app on your phone.
- You can change the interface language at any time in the top right corner.
2 Creating a short link
- In the “Links” menu, click “New link”.
- Paste the full address including https:// into “Destination URL”.
- For your own address (e.g. qli.fr/summer), fill in “Custom alias” – from the Starter plan. An empty field means a random alias.
- Click “Create link”. The short link appears in the link detail and you can copy it.
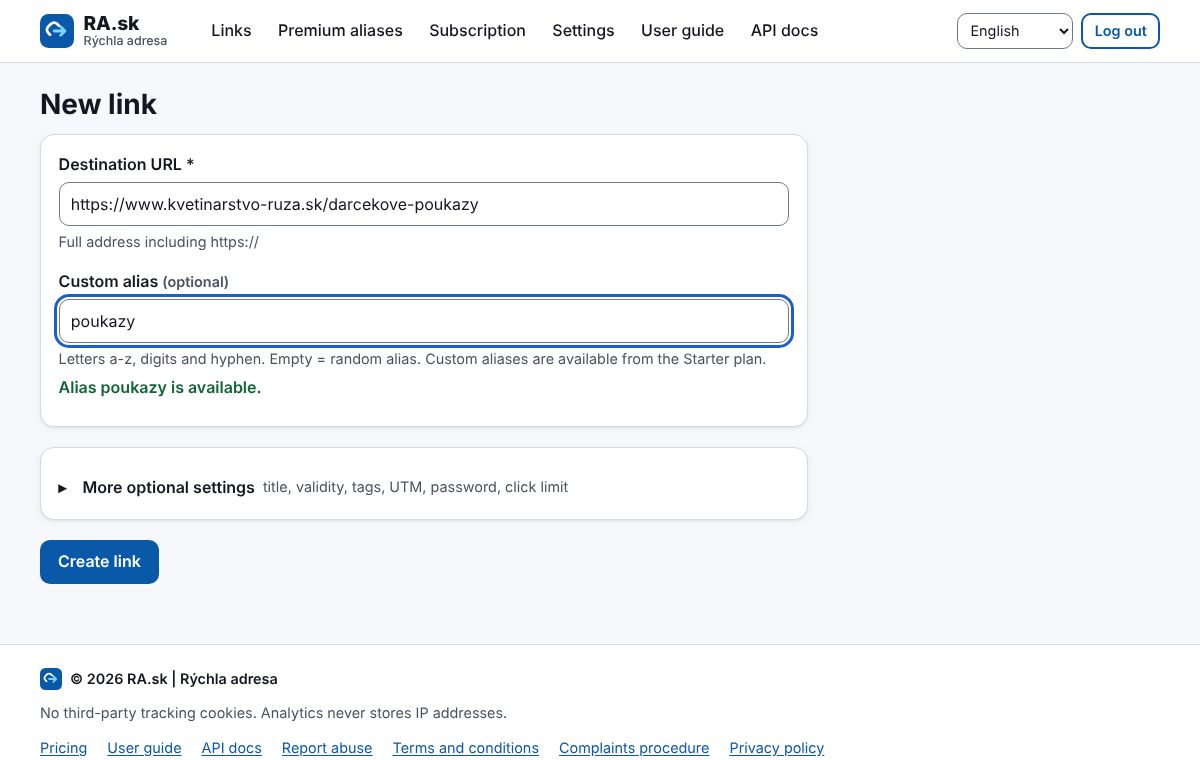
- Under “More optional settings” you will find: internal title, start date, valid-until date, fallback address after expiry, tags, campaign, redirect type, UTM parameters, password and click limit. The app remembers whether you keep this section open.
- Leave the redirect type at 302 (recommended). Browsers cache permanent 301/308 redirects, so a change of destination would reach visitors late.
3 Link list
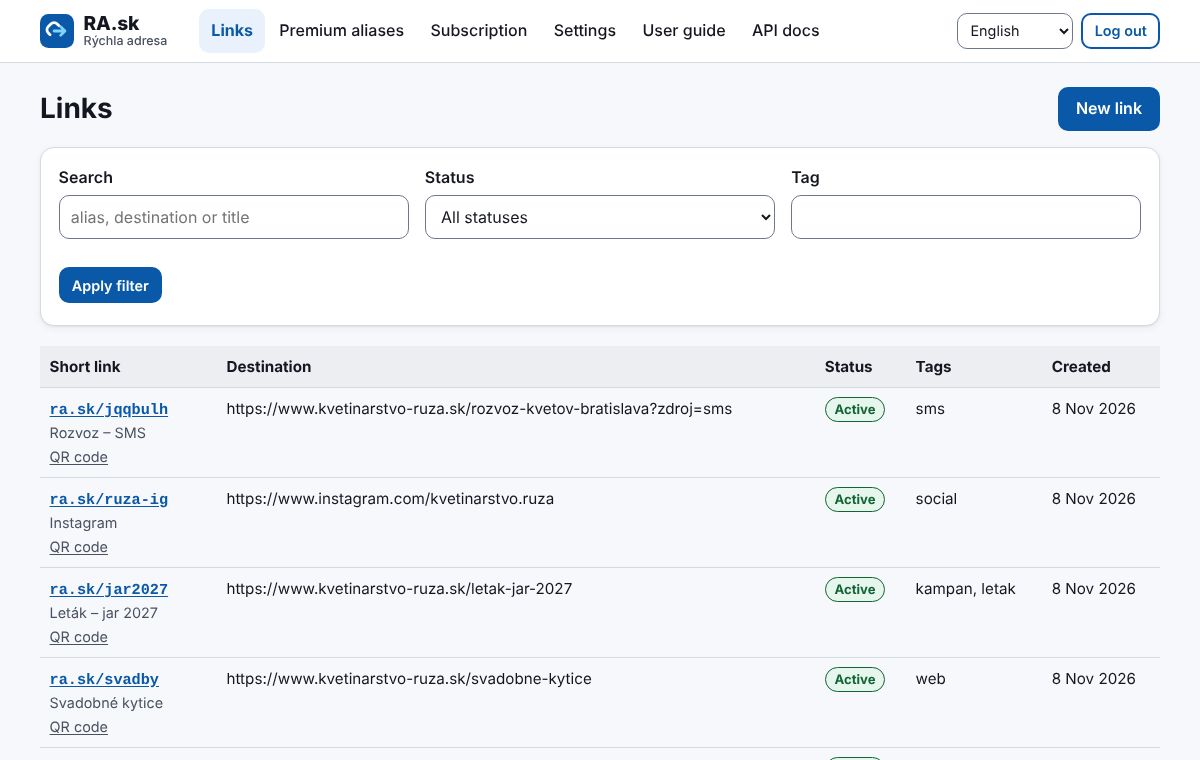
The “Links” menu shows all your links with their click counts. You can search them and filter by status and tags. Click a link to open its detail.
4 Link detail and editing
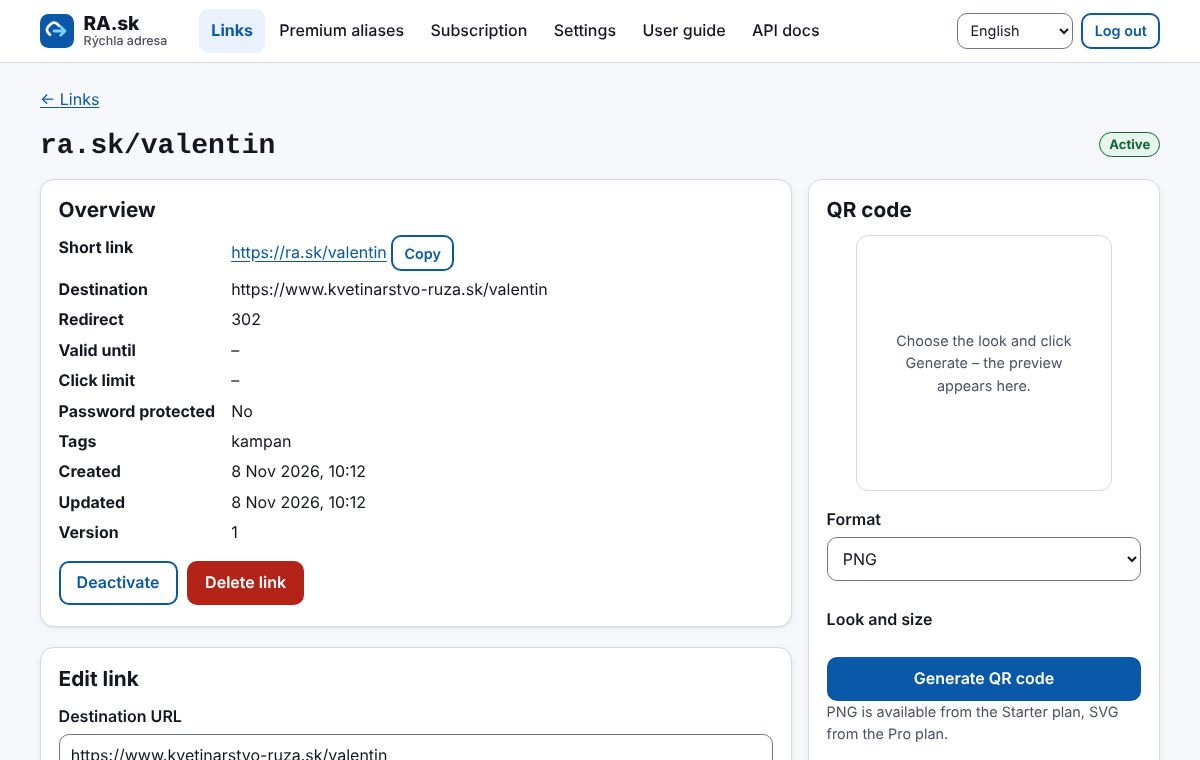
- Copy the short link with “Copy” and paste it anywhere – into a text message, an e-mail or social media.
- In “Edit link” you can change the title, tags, validity or password. The destination can be changed from the Pro plan – the link and any printed QR code stay the same.
- “Deactivate” switches the link off temporarily, “Delete link” removes it permanently.
5 QR code
- In the link detail, find the “QR code” section.
- Choose the format (PNG from the Starter plan, SVG for print from the Pro plan), size, margin and colours.
- Click “Generate QR code” and then “Download”.
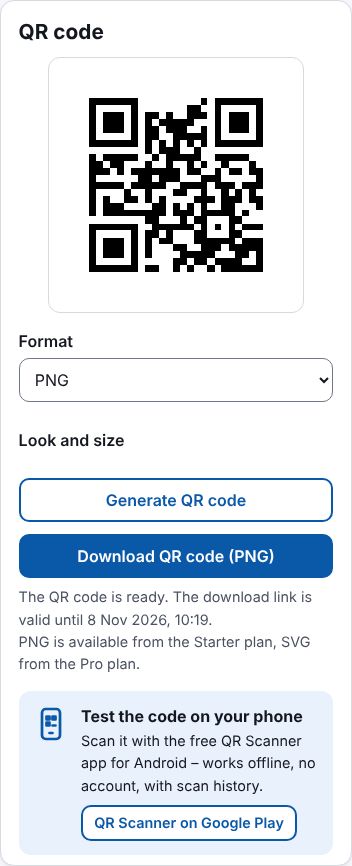
- You can put your own logo in the centre of the code (PNG or JPG up to 300 kB). We verify a code with a logo by scanning it before download.
- The QR code points to the short link, not directly to the destination. If you change the destination, printed flyers and posters keep working.
- Dark colours on a light background scan best. Error correction level “M” is enough for normal printing.
6 Click statistics
The link detail shows a chart of clicks by day or hour, countries, device types and the websites people came from. Bot clicks are kept separate from people.
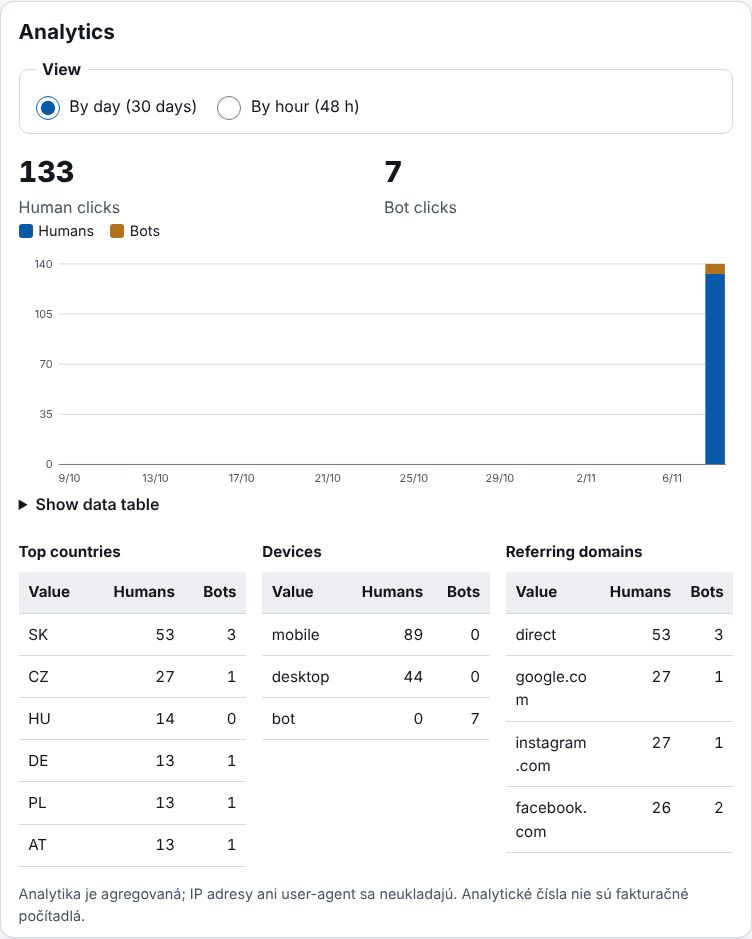
- Download the statistics with the “Download CSV (Excel)” button below the tables. On the Business plan, Links → “Bulk import” creates up to 1,000 links at once from a CSV file.
- QLI.fr does not store visitors’ IP addresses – the statistics are aggregated.
- The number of recorded events per month depends on your plan (see the “Subscription” menu).
7 Plans and subscription
You choose your plan in the “Subscription” menu under “Change plan”. Prices are final. Paying annually saves 20 %.
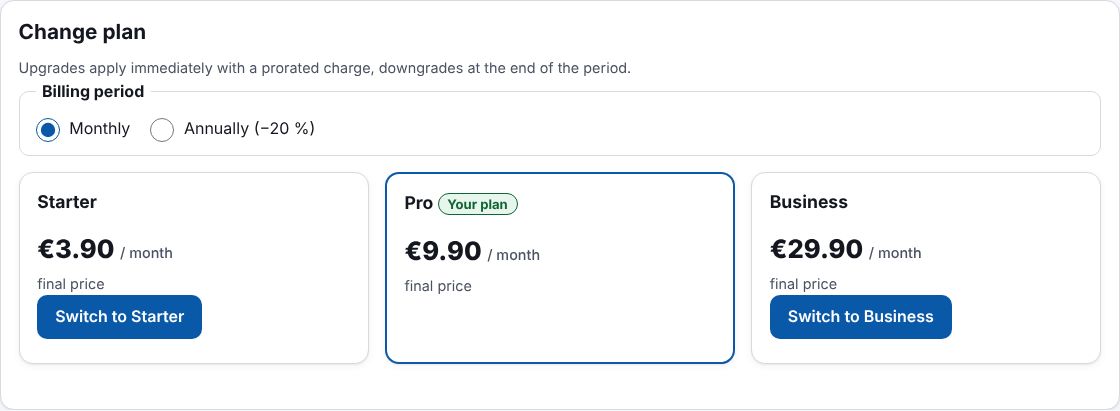
- Free (€0): 10 links, statistics.
- Starter (€3.90/month): custom aliases, PNG QR code, API, 300 active links.
- Pro (€9.90/month): change link destination, SVG QR code, custom domain, team of up to 3, 5,000 active links.
- Business (€29.90/month): 50,000 active links, team of up to 10, 5 custom domains, bulk operations.
- Upgrading applies immediately – you only pay the pro-rata amount until the end of the period. Downgrading applies at the end of the paid period.
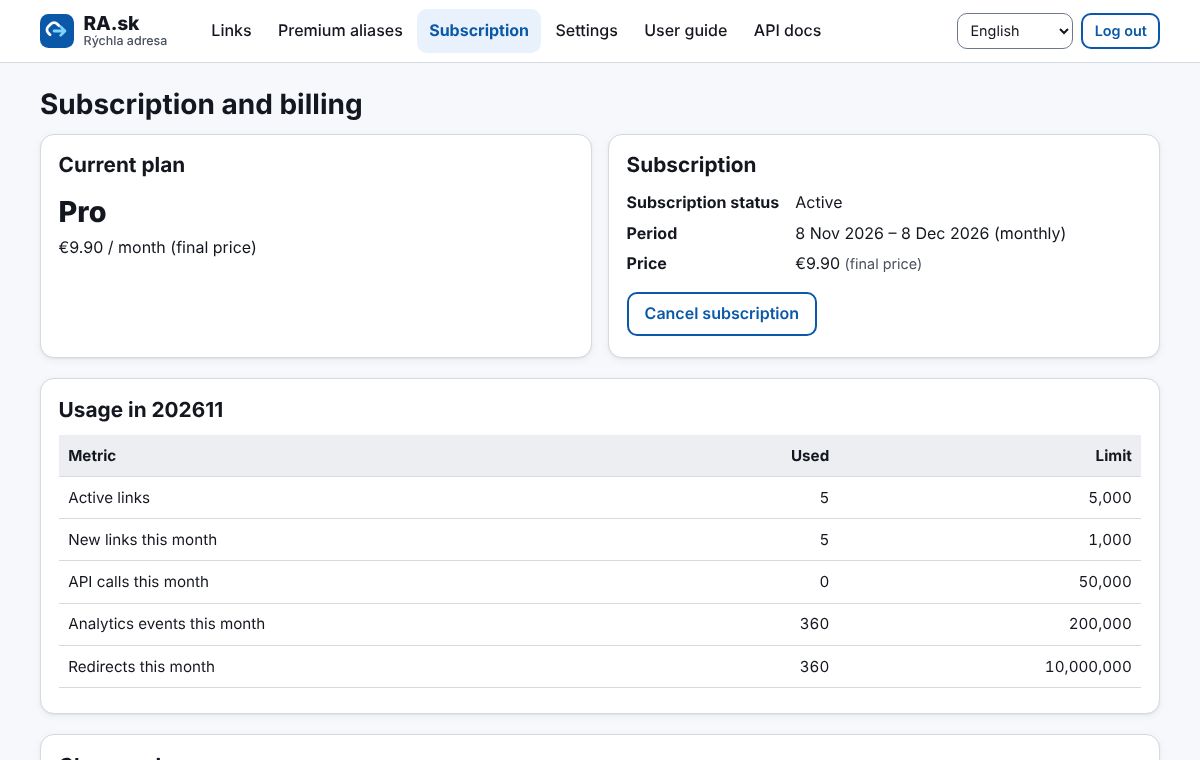
- Current usage (links, clicks, API calls) is shown in the same section in the “Usage” table.
8 Paying by card
- Before your first payment, fill in your billing details (further down in the same menu) – they appear on the invoice.
- Click “Switch to …” on the plan you want (for example “Switch to Pro”). A secure Stripe payment page opens.
- Enter your card details (Visa, Mastercard and others). If your bank asks, confirm the payment in its app (3D Secure).
- After payment you return to QLI.fr. The plan is active within a few seconds and the invoice is immediately in “Invoices”.
- QLI.fr never processes or stores your card number – payments are handled by Stripe. Stripe stores the card for automatic renewal.
- The subscription renews automatically. If a renewal payment fails, you receive an e-mail and after a grace period the account switches to the Free plan. Your links are kept.
9 Billing details
- In the “Subscription” menu, under “Billing details”, choose whether you are a private person or a business.
- A business enters the company name and company ID, and optionally the tax ID and VAT ID. A private person enters their full name.
- Add the street, postal code, city, country and the e-mail for invoices, then click “Save”.
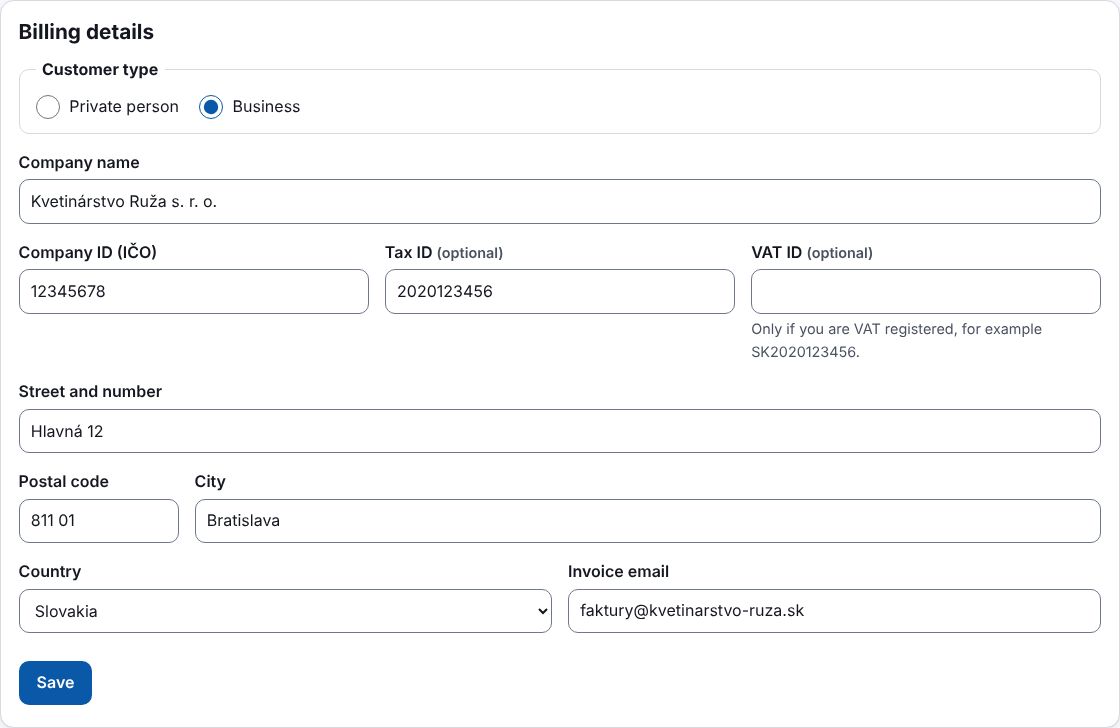
- Changes apply to new invoices. Invoices already issued do not change.
10 Invoices and credit notes
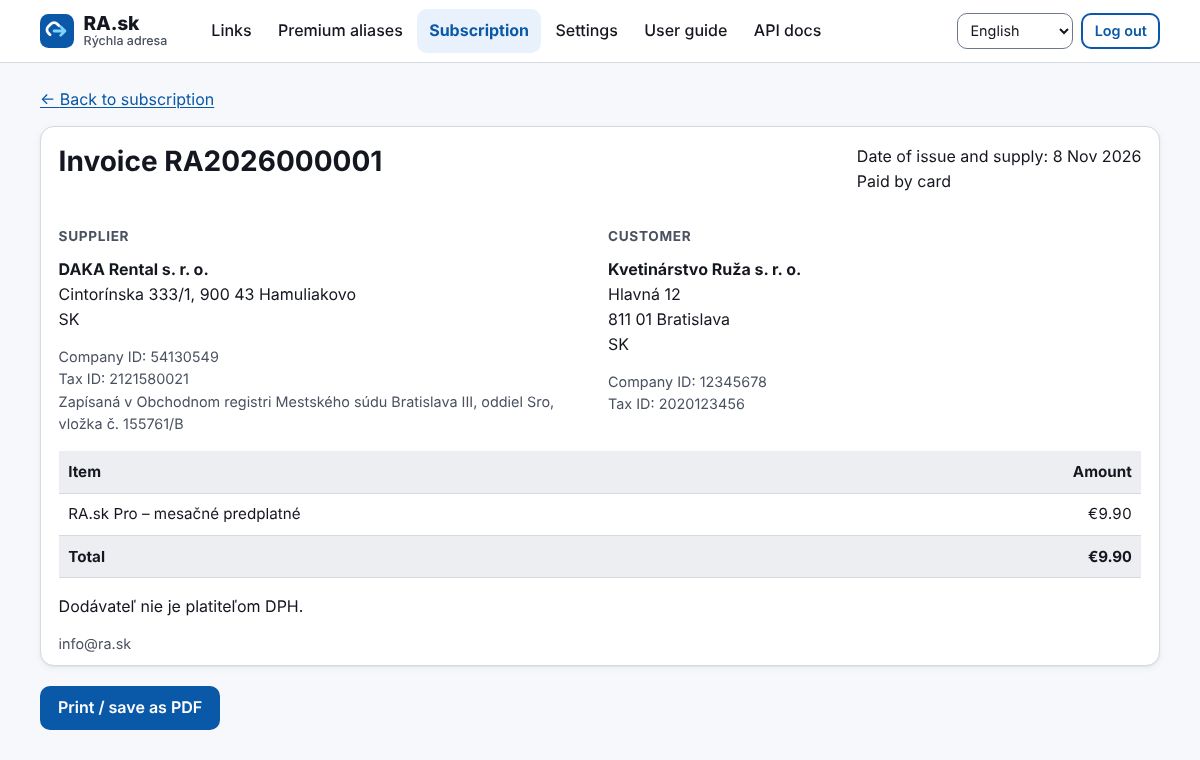
Every payment has an invoice in the “Subscription” menu under “Invoices”. Click an invoice to open it and use “Print / save as PDF” to save it. A refund automatically creates a credit note.
11 Premium aliases
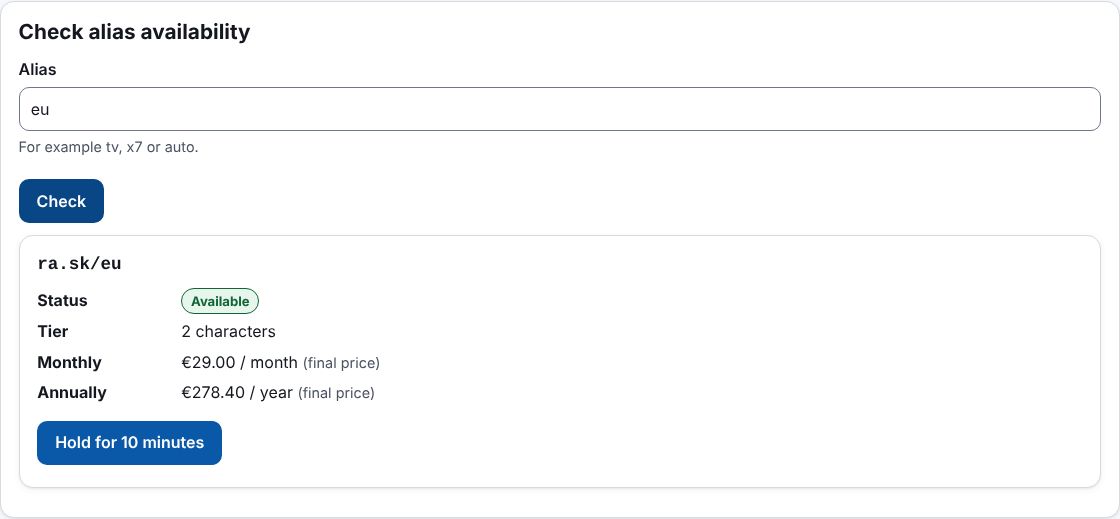
Premium aliases are very short or memorable addresses such as ra.sk/tv. You do not buy them outright; you license them per month or per year.
- In the “Premium aliases” menu, enter the alias you want and check its availability and price.
- If it is free, click “Hold for 10 minutes” – during that time the alias is reserved for you.
- Choose monthly or annual payment, accept the licence terms and pay by card.
- After payment, assign the alias to a link (when creating or editing a link).
- The licence renews automatically. If it is not renewed, you have 14 days to pay; after that the alias is suspended for 90 days and only released after quarantine.
- Single-character aliases and brand aliases are approved manually (business verification may be required).
12 Team
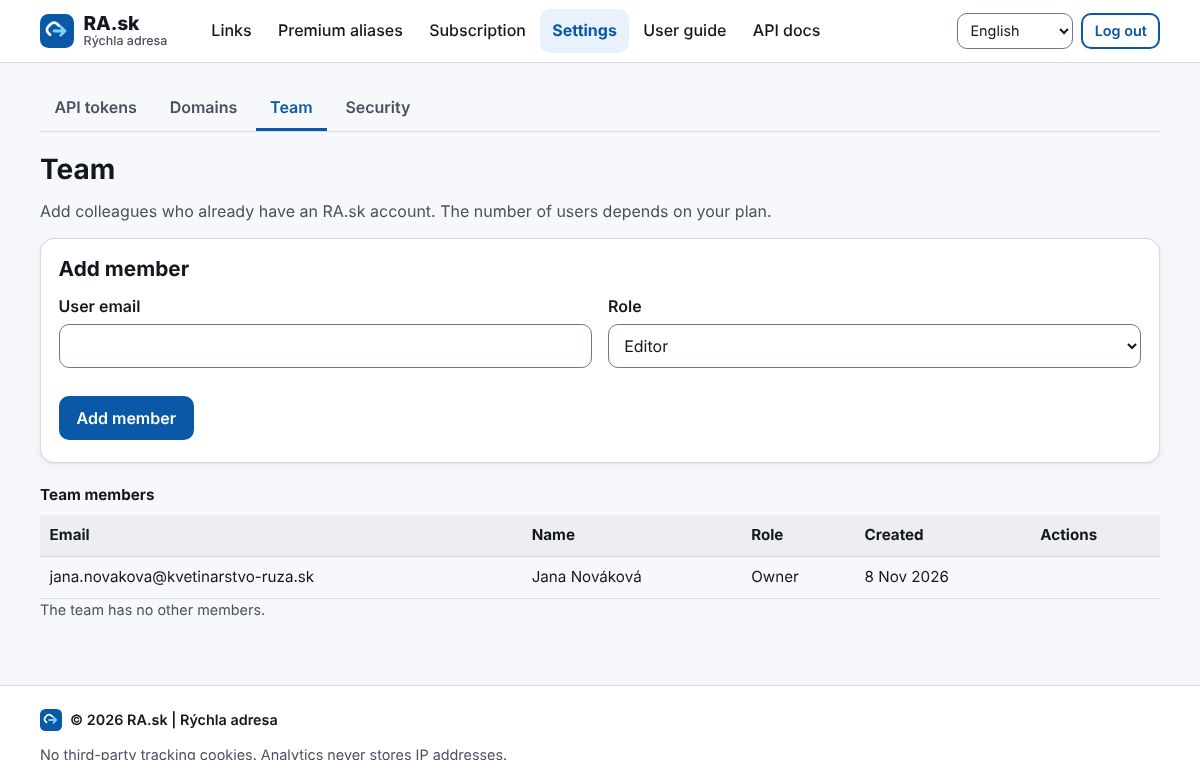
From the Pro plan you can invite colleagues: Settings → Team. Enter an e-mail and choose a role – Administrator (everything except ownership), Editor (links) or Read only.
13 Custom domain
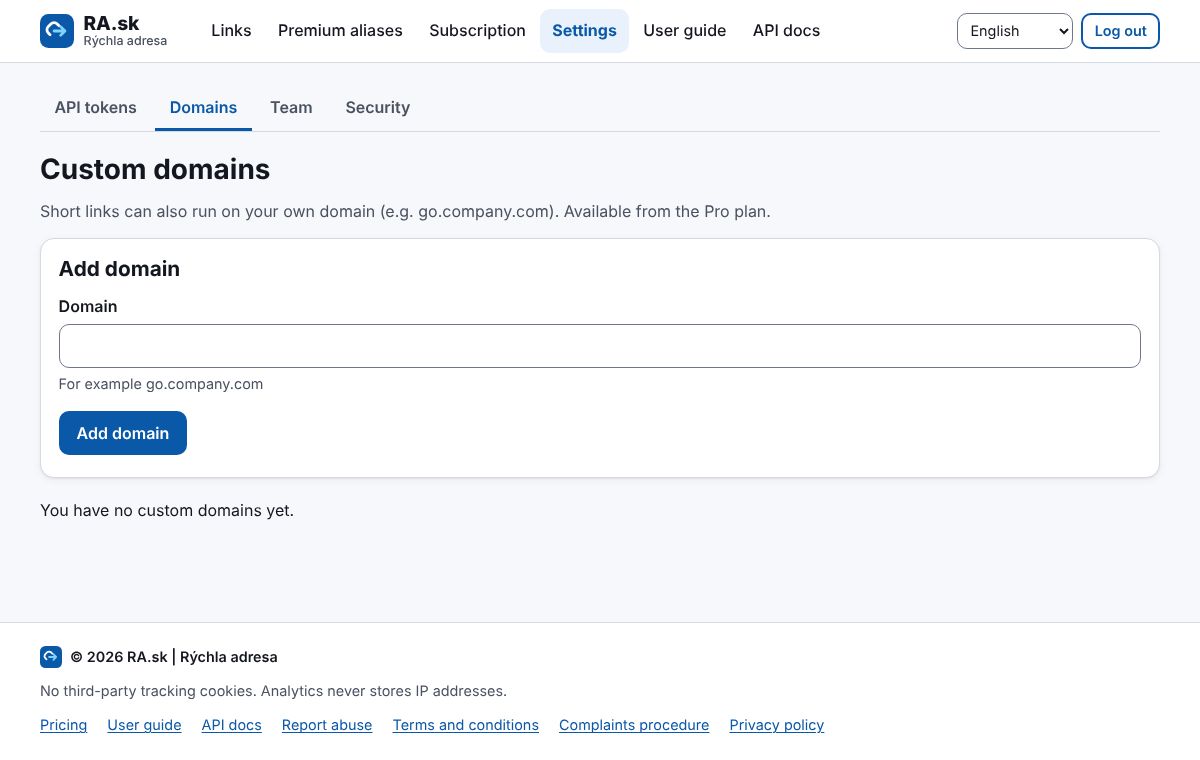
- Settings → Domains: enter a domain such as go.company.com (from the Pro plan).
- At your domain provider, add the TXT record shown (ownership check) and the CNAME record (routing).
- Click “Verify DNS”. Once verified, you can choose your domain for links.
14 API and tokens
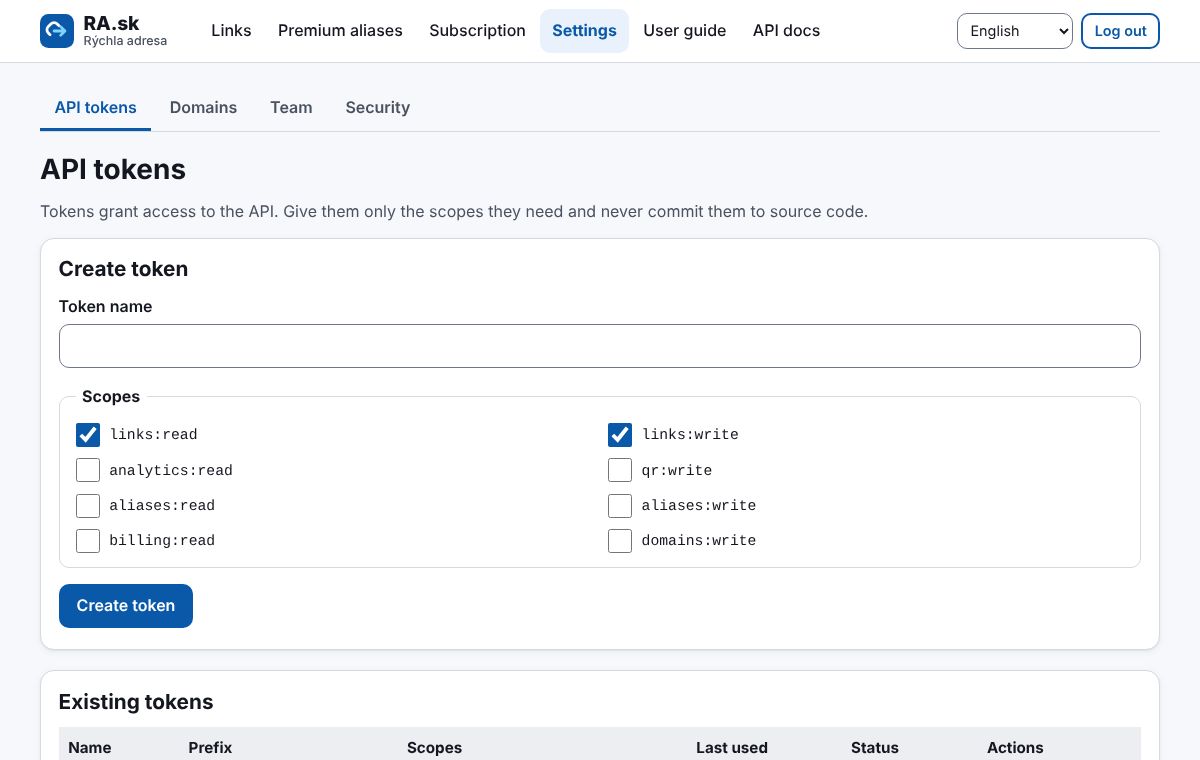
From the Starter plan you can also create links from your own systems through the API. In Settings → API tokens, create a token, give it only the permissions it needs and store it safely – it is shown only once. Steps and examples are in the “API docs”.
15 Account security (two-factor authentication)
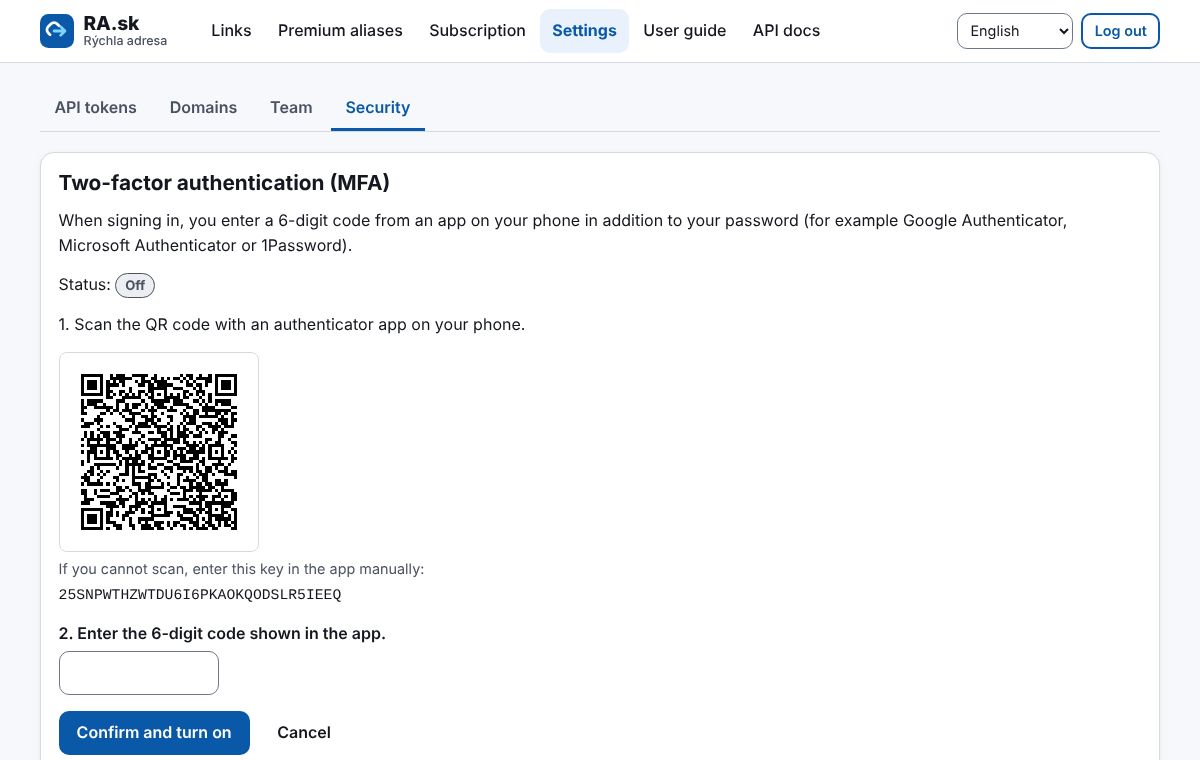
- Settings → Security → “Turn on MFA”.
- Scan the QR code with an authenticator app on your phone (Google Authenticator, Microsoft Authenticator, 1Password…).
- Enter the 6-digit code from the app and confirm. Next time you log in, you will enter the code as well as your password.
16 Cancelling a subscription and withdrawal
- Turn off automatic renewal in the “Subscription” menu with “Cancel subscription”. The plan stays active until the end of the paid period, then the account switches to Free and your links are kept.
- Consumers may withdraw from the contract within 14 days – just send an e-mail to info@ra.sk. Details are in the Terms and conditions.
- You can download your data or delete your account – see the Privacy policy for instructions.
Didn’t find an answer? Write to us at info@ra.sk.